

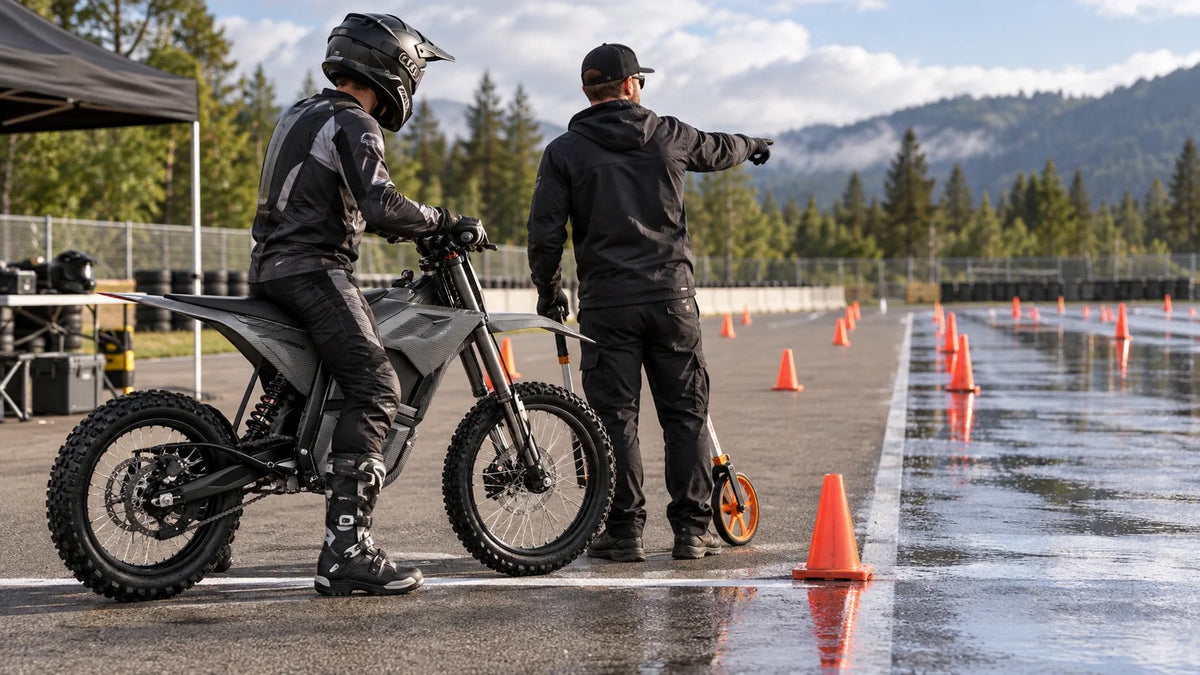
Electric Dirt Bike Wet vs Dry Braking: Build a Personal Stopping-Distance Baseline
Wet braking usually requires more margin than dry braking, but a single published distance cannot predict one rider, tire, surface and bike. Build a personal baseline with repeated low-speed straight-line stops under controlled conditions. Record entry speed, surface, tire condition, pressure, rider input and distance. The result is a comparison tool for that setup, not a product claim and not permission to brake near the traction limit on a public trail.
Before testing, use the Valtinsu user manual to confirm brake inspection, tire pressure and operating limits. The electric dirt bike collection can help readers compare intended use, but only a controlled test can describe their own stopping baseline.
Understand what the distance contains
Total stopping distance includes perception and reaction distance plus the distance traveled after braking begins. This protocol measures the second part by using a defined brake marker, while the rider still needs sufficient approach and runoff. Speed matters strongly because kinetic energy rises with the square of speed; a small speed difference can obscure the effect of surface moisture.
 Figure 1. Official Valtinsu EM5 Ultra product image accompanying understand what the distance contains. Confirm component locations and limits against the exact model page and current manual.
Choose a controlled test site
● Closed to traffic, pedestrians, pets and crossing trails.
● Straight, level and wide enough for error correction.
● Long runoff beyond the expected stopping point.
● Consistent surface with no oil, loose gravel, algae, leaves, mud pockets or drainage grooves.
● Permission to wet the surface and conduct repeated low-speed practice.
● A spotter positioned outside the travel lane.
Do not create an artificial wet test on a public road or environmentally sensitive trail. If the surface changes during the session, cancel the comparison rather than treating unlike runs as data.
 Figure 2. Official Valtinsu EM-5 product image accompanying choose a controlled test site. Confirm component locations and limits against the exact model page and current manual.
Inspect and standardize the bike
Check tires, cold pressure, wheel security, brake pads, rotors, lever feel and control operation. Use the same battery state range, riding mode, load and protective equipment for both conditions. Regenerative braking, if fitted, may vary with battery state, temperature or software logic, so record whether it was active and do not rely on it as the sole brake.
Lay out a measurable course
● Mark an acceleration area and a speed-settling zone.
● Create a speed gate before the brake marker using a reliable speed measurement method.
● Place a clearly visible brake marker perpendicular to the travel line.
● Provide a measurement lane from the marker to the final front-wheel contact point.
● Leave generous runoff and a safe turnaround path.
A handlebar display may lag or round speed. If precise comparison matters, use the same independent logger for all runs. Reject a run when entry speed is outside the chosen tolerance, the rider brakes before or after the marker, or the bike deviates from the lane.
 Figure 3. Official Valtinsu EM5 Pro product image accompanying lay out a measurable course. Confirm component locations and limits against the exact model page and current manual.
Establish the dry baseline first
Begin well below normal trail speed. The rider should be upright, looking forward and applying both brakes progressively as appropriate for the fitted system and training. Do not chase the shortest possible distance. Continue until several valid runs cluster reasonably, which shows that the entry and input are repeatable. Record every attempt, including rejected trials and the reason for rejection.
 Figure 4. Official Valtinsu EM-5 product image accompanying establish the dry baseline first. Confirm component locations and limits against the exact model page and current manual.
Create a defined wet condition
Wet the same lane evenly without creating standing water or washing contaminants into it. Record air and surface temperature, wetting method and time since wetting. A damp film, active rain and pooled water are different conditions. Make a gentle reconnaissance pass and stop the test if traction is unpredictable.
Repeat the protocol without compensating aggressively
Use the same speed target and markers. Apply the learned progressive technique, but do not increase brake pressure simply to make the wet number resemble the dry result. If either wheel skids or the bike triggers an unfamiliar control response, release as trained, stabilize, and end or reduce the test. The purpose is to learn margin, not prove skill.
Analyze median, spread and warning signs
For each condition, calculate the median of valid runs and note the shortest, longest and spread. A wider wet spread may matter more than the average increase because it shows less predictable traction or input. Compare only sessions with similar entry speed and setup. Do not combine different tires, pressure, loads or surfaces into one headline number.
● Median dry braking distance and valid-run count.
● Median wet braking distance and valid-run count.
● Difference in distance and percentage, labeled for this exact setup.
● Entry-speed range and rejected-run reasons.
● Any fade, lever change, skid or warning indication.
 Figure 5. Official Valtinsu EM5 Ultra product image accompanying analyze median, spread and warning signs. Confirm component locations and limits against the exact model page and current manual.
Turn the result into riding decisions
Use the larger distance and the variability to set a conservative following and sight-distance margin. If wet results are unstable, inspect tires and brakes, seek rider training and lower speed rather than tuning solely for a shorter test number. Repeat after tire, pad, rotor, pressure or control changes, but do not compare across sessions unless the course and conditions are documented.
Control rider learning and brake temperature
Repeated stops improve familiarity, so later runs may shorten even when the surface has less grip. Randomizing wet and dry runs would create temperature and transition problems, but running all dry trials first creates a learning effect. The practical answer is to use a warm-up block that is not counted, pause until the brakes return to a consistent condition, and document run order. Never cool a hot rotor with water; rapid cooling and contamination can alter the brake.
Use a simple data sheet
For every attempt, log run number, condition, entry speed, brake-marker accuracy, stopping distance, surface note and validity. Add a short rider note such as “rear stepped left,” “lever changed,” or “braked early.” Preserve rejected runs rather than deleting them, because a high rejection rate is evidence that the method or speed is too demanding.
Know what the test cannot prove
The baseline does not measure emergency reaction, downhill braking, cornering, loose terrain or real rain visibility. It also does not certify a tire or bike as safe. Its value is narrower: it shows how much the measured stopping phase and repeatability changed on one controlled lane. Use that evidence to increase margin and plan training, not to promise a stopping distance to another rider.
Repeat the baseline only when the rider is rested and the equipment has returned to a consistent condition. A shorter result achieved through an unintended skid, early brake application or speed below the target is invalid, even if it looks impressive on paper.
Start With the Specification, Then Build Your Own Braking Baseline
Published specifications identify the bike; they do not predict a rider's exact stopping distance on wet ground. Use the Valtinsu electric dirt bike collection to compare model power, wheel size and intended use, then build a conservative personal baseline with the same rider, tires, surface and entry speed. Wet testing should begin well below normal trail pace.
The Valtinsu EM-5 Ultra is listed with a 72V/25Ah battery, 17-inch front and 14-inch rear wheels, and a 56 mph top speed. Those figures make controlled braking practice more important, not faster test runs. Use the low-speed protocol in this article and stop for pulsing, fade, poor lever feel, damaged tires or inconsistent traction.
Use Valtinsu's electric dirt bike braking and test resources as the broad ownership reference, then confirm every procedure, part and limit against the exact model page and current manual.
Quick Decision Table
|
Test result |
What it shows |
Riding adjustment |
|
Wet median is longer |
Available friction is lower |
Reduce entry speed and increase following distance. |
|
Results vary widely |
Surface or rider input is inconsistent |
Use more margin and repeat only in a controlled area. |
|
Lever feel changes |
Brake condition may be changing with water or heat |
Stop the comparison and inspect the brake system. |
|
One wheel locks early |
Balance or surface grip is poor |
Do not chase a shorter stopping distance. |
FAQs
What speed should I use?
Use a low speed appropriate to the closed site and your training. The exact target matters less than keeping it consistent and leaving abundant runoff.
Use this quick classification:
● Keep the course, rider, tire pressure, load and entry-speed method consistent.
● Record surface condition and temperature instead of labeling every run simply wet or dry.
● Use the median and the spread of valid runs; the shortest stop is not a safe planning number.
How many runs are enough?
Continue until at least several valid runs cluster without fatigue or brake heating changing the system. Report the count and spread instead of selecting one best stop.
Should I test on wet grass or leaves?
No. Those surfaces can change abruptly and create avoidable fall and trail-damage risk. Begin on a controlled, uniform practice surface.
Does ABS make wet distance predictable?
No. ABS can help manage wheel lock where fitted, but surface, tire, speed and rider input still change distance. Verify whether the bike actually has the feature.
Follow this check sequence:
1. Establish several controlled dry runs at one low entry speed and mark the actual braking point.
2. Repeat only when the wet test area is closed, predictable and provides a safe runoff zone.
3. Compare median distance and consistency, then use the result to increase margin rather than chase a record.
Can I compare my number with another bike?
Only as a limited observation if speed, tires, surface, load, brakes, test method and environmental conditions match. Otherwise the comparison is misleading.
Why did later runs become longer?
Possible causes include brake temperature, surface change, tire contamination, rider fatigue or inconsistent entry speed. Stop and identify the variable before continuing.
Why should the median matter more than the shortest stop?
The shortest run often reflects a favorable surface patch, a warmer brake or a rider who unconsciously braked earlier. The median of several valid runs better represents repeatable performance, while the spread shows how consistent the bike and rider are. Discard runs only for a documented reason such as missed entry speed or obstacle interference. Do not chase a shorter number on a wet surface. Use the baseline to increase following distance and reduce entry speed, not as a claim that the bike will always stop within one fixed distance.


Looking for something else?

How We Test Electric Dirt Bike Range: A Repeatable Real-World Protocol
LEARN MORE
Rated Power vs Peak Power on Electric Dirt Bikes: What the Numbers Actually Mean
LEARN MORE
Electric Dirt Bike Energy Use: How to Measure Wh per Mile on the Trail
LEARN MORE
How to Measure Electric Dirt Bike Battery Health Without Guessing
LEARN MORELooking for something else?

How Much Does an Electric Dirt Bike Weigh?
LEARN MORE
Electric Dirt Bike Brake Fade: Causes, Warning Signs and a Safe Test Method
LEARN MORE
Electric Dirt Bike Climbing Angle: Degrees, Grade and Real Trail Limits
LEARN MOREYou may also like
VALTINSU EM-5 Off-Road Electric Dirt Bike
VALTINSU EM-5 Pro Off-Road Black Electric Dirt Bike
VALTINSU EM-5 Pro Green Electric Dirt Bike
Further reading

Why Electric Dirt Bike Charging Slows Near Full: The Charging Curve Explained
Electric Dirt Bike Wet vs Dry Braking: Build a Personal Stopping-Distance Baseline

Electric Dirt Bike Skid Plate Inspection After a Rock Strike
