

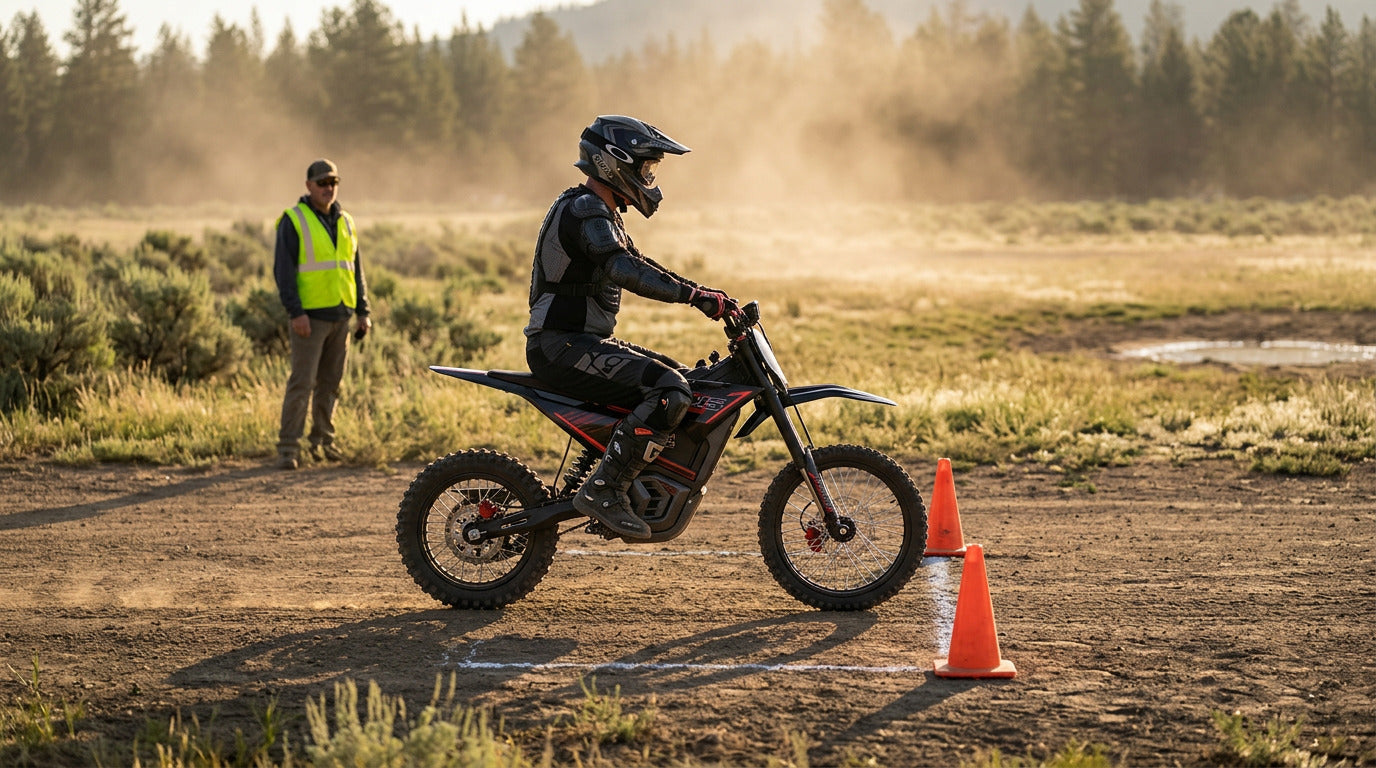
Electric Dirt Bike Emergency Braking Drill: A Progressive Practice Plan
An electric dirt bike emergency-braking drill should build two outcomes in order: a clean, repeatable quick-stop sequence, then shorter stopping distance under identical, controlled conditions. Start at walking pace in a legal closed range, close the throttle, apply both mechanical brakes progressively, keep the motorcycle straight, and stop with runoff remaining.
Use one repeatable sequence: recognize the cue, close the throttle, confirm the documented non-driving response, squeeze both mechanical brakes progressively to the available traction, keep the motorcycle straight, and finish balanced. After technique is stable, record stop position under unchanged conditions and improve gradually with qualified supervision.
Braking on an adult electric off-road motorcycle changes one thing riders underestimate. No clutch, so no familiar lever that disconnects power from the rear wheel. Depending on the model, closing the throttle, triggering a brake cutoff switch, or some other controller input is what interrupts motor drive. Know which one applies to your machine before adding pace.
What follows is a walking-pace-to-moderate progression, best completed with a qualified coach.
Start With the Drill's Real Objective
Control comes first; standardized stopping distance becomes a valid secondary measure only after the sequence is stable.
A repetition counts as clean when all of the following hold:
- A clear stop cue the rider recognizes on the way in
- Throttle closed before or as brake pressure begins
- Handlebars straight, motorcycle upright
- Pressure built progressively instead of grabbed
- Eyes up and through the stopping lane
- No unintended acceleration anywhere in the sequence
- No wheel lock, tuck or uncontrolled slide; any occurrence ends the run and requires a supervised reset
- A stable full stop with runoff space still left over
Shorter is not automatically better. First establish a repeatable, skid-free stop. Then compare stopping position only when entry cue, bike, rider, surface, tire, mode and approach pace remain unchanged. Stop the session if technique degrades while distance improves.
MSF's Tips & Practice Guide for the Off-Highway Motorcyclist includes exercises for braking and quick stops. DirtBike School puts controlled starting and stopping ahead of trail work, and that order is deliberate.
Build a Closed Practice Range Before You Ride

Range design is the first layer of any dirt bike braking practice plan. It protects riders more reliably than technique advice does.
Choose a Predictable Surface
Pick legal, level, open ground with firm, consistent traction. Avoid public roads. Also avoid active parking lots, blind approaches, steep grades, mud, deep gravel, loose sand, wet grass, embedded rock, and rutted trail entrances.
Early sessions are not terrain tests. They isolate braking coordination.
Mark Four Separate Zones
A simple cone layout does the job.
- Entry lane: settle the motorcycle and establish a steady pace
- Stop cue: a visible cone pair or painted line where the stopping sequence begins
- Braking lane: straight, wide, and empty
- Runoff zone: extra clear space well beyond the intended stop
Build separate entry, braking, runoff and escape zones. At walking pace, demonstrate several controlled stops first; place the course boundary beyond the longest stop and add a conservative margin. Re-size every zone before pace increases. If the full approach and runoff cannot remain clear of people, vehicles and obstacles, do not begin.
Control Who Enters the Range
One rider in the lane at a time. A coach or spotter stands outside the travel path, never downrange, and everyone agrees on signals for start, stop, abort, and shutdown before the first run.
Inspect the Mechanical and Electrical Stop Systems
Two systems, two jobs. The brakes slow the wheels. Something separate has to keep the motor from continuing to drive them.
Check the Physical Brakes
Before riding, confirm:
- Each control moves normally and returns freely on its own
- Lever and pedal travel feels consistent between pulls
- Nothing reaches the grip or its movement limit unexpectedly
- Hoses, cables, calipers, rotors, fasteners and pads show no obvious damage
- Both wheels rotate without severe brake drag
- Tires suit the surface and are visibly serviceable
Adjustment procedures are out of scope here. When brake travel, pad condition, hydraulic feel, rotor alignment or control reach is uncertain, the answer is the manual or a qualified technician, not a drill.
Confirm the Brake Cutoff
Brake cutoff on an electric dirt bike usually works one way: a switch in the brake control signals the controller to interrupt motor output. Usually. Not every system is arranged like that, and some respond differently.
Confirm the response through an exact manufacturer-approved procedure or qualified service check before riding. The Valtinsu user manual library is the reference point for EM-series bikes. A cutoff does not replace closing the throttle, and it does not replace working mechanical brakes.
Learn the Quick-Stop Sequence Without Chasing Percentages
Coordination and feedback are the whole lesson. Electric dirt bike braking technique does not reduce to a fixed front-to-rear ratio, and no ratio survives a change of bike, tire or surface.
Close the Throttle and Confirm Drive Stops
Return the throttle deliberately to its closed position. Do not assume that touching a brake lever always cancels motor output.
If the bike keeps pulling, behaves inconsistently between runs, or responds differently from what the manual describes, the session ends until the system has been inspected.
Build Brake Pressure Progressively
Close the throttle and squeeze both brakes with continuously increasing pressure matched to the available traction. Do not use a timed three-stage formula, grab a lever or stomp a control. The exact technique must match the motorcycle’s documented brake layout and the instructor’s method.
Both brakes contribute. How much each can contribute keeps changing as weight moves forward during deceleration, which is why a single percentage is useless on paper and worse on dirt.
Keep the Chassis Organized
Look ahead. Keep the motorcycle upright, stay connected to it through the legs, and avoid carrying body weight through locked arms. An extreme rearward hang is not the target.
Finish the Stop Deliberately
Reach a complete stop before turning, accelerating or leaving the lane. Balance first, foot down only as needed. Runs that dissolve into a rolling turn measure nothing.
Follow the Progressive Emergency-Braking Practice Plan

Five stages. Each one has a gate, and every gate is observable rather than a feeling.
Stage 1: Stationary Control Rehearsal
With the bike securely supported and motor power disabled as the manual directs, rehearse:
- Finding each brake control without looking down
- Closing and releasing the throttle
- Applying pressure smoothly rather than in a jerk
- Returning every control fully
- Responding to the coach's stop and abort signals
Progression gate: the rider identifies and operates the correct control every time, without hesitation.
Stage 2: Walking-Pace Stops
Ride slowly enough that a coach can watch the whole sequence unfold. Begin braking at the marked cue. Stop in a straight line.
Five things get watched on every run:
- Throttle closure, deliberate and complete
- Both brake controls arriving smoothly
- Head and eyes remaining up
- No sudden steering input
- Stable final balance
Progression gate: several repeatable stops with no unintended drive, no grab, no skid, no missed cue.
Stage 3: Repeatable Low-Speed Quick Stops
Add a small amount of entry pace. Everything else stays identical, including the cue, the lane, the surface, the selected ride mode, and where the coach stands.
Record what each repetition actually was:
- Controlled
- Longer than intended
- Triggered late
- Unstable
- Aborted
One word per run. That log becomes the drill's memory, and in our experience riders who keep it stop arguing with the coach about what just happened.
Progression gate: the rider reproduces the sequence. One unusually short stop proves nothing.
Stage 4: Coach-Cued Stops
The coach signals at different points inside a predetermined cue window. Perception and response get tested. A surprise hazard does not get created.
The rider should not know the exact cue point, but must know where the cue can fall and how much clear runoff sits behind it.
Progression gate: the rider responds without staring at the cone, freezing the arms, reopening the throttle, or steering out of the lane.
Stage 5: Moderate-Pace Consolidation
Raise entry pace only once the earlier stages hold. What counts as moderate gets decided on site by a qualified coach, on that surface, with that rider on that bike. Assigning one number to every reader would be guesswork dressed up as instruction.
Fewer runs per set now. Add cooldown and inspection pauses between them. More momentum means more brake heat, and heat changes lever feel even when the controls still feel familiar to the hand. Brake heat can change stopping response. Any increase in lever travel, softening, pulsing, rubbing, odor, noise or other change in feel is a stop-and-inspect condition; do not normalize it by continuing the set.
Progression gate: the same sequence, no deterioration in control, and the rider can explain what changed as pace increased.
Use Observable Results Instead of a Universal Stopping Distance

Score technique first, then use stop position or measured distance as a secondary within-session comparison after the entry cue, bike, rider, surface, tire, mode and approach pace are controlled. Distance depends on surface, tire, temperature, rider weight and entry pace, so the number moves for reasons that have nothing to do with skill.
Track five observations instead. All five are visible from outside the lane, which means a coach or a camera can judge them without the rider guessing at what happened.
|
Observation |
What It Reveals |
|
Cue recognition |
Whether the rider begins at the intended point |
|
Throttle closure |
Whether motor drive is interrupted deliberately |
|
Stop position |
Whether repetitions are becoming more consistent |
|
Motorcycle path |
Whether the bike stays upright and inside the lane |
|
Rider condition |
Whether tension or fatigue is degrading control |
Measure distance only to compare the same rider, bike, surface, setup and entry condition inside a single session. Held up against a different model, tire, surface, or weather condition, that number tells nobody anything.
If video is used, secure the phone outside every entry, braking, runoff and escape path; nobody stands downrange to film. Use a side-on view that captures the cue, throttle closure, rider response, both wheels and the full stop, then caption the clip with the bike, surface and drill stage.
Front Brake vs Rear Brake vs Both
Front Brake vs Rear Brake
The front tire gains load as the motorcycle decelerates, so the front brake converts more of that load into stopping force. The rear gets lighter and skids more easily. Neither fact makes the rear optional or the front something to fear.
One Brake vs Both Brakes
Single-brake exercises have a place at very low pace, with a coach diagnosing a control habit. As a blanket recommendation for emergency stopping, no. This drill targets coordinated use of both systems unless the manufacturer or instructor says otherwise.
Progressive Pressure vs Panic Input
Progressive pressure lets tire load and chassis movement build in an order the rider can actually read. Abrupt pressure can exceed available traction before the rider has registered anything. Rear-wheel control deserves its own practice time, and mastering the rear brake on an electric dirt bike covers that skill on its own terms.
Mechanical Brakes vs Regenerative Braking
Regeneration is not the emergency stop. It may add deceleration where the controller and motor support it, and it stays a supporting layer.
- Mechanical braking: force produced through the pads, rotors, calipers and tire contact patches
- Regenerative braking: motor resistance under defined controller conditions, varying with settings, battery state, speed, temperature and system design
- Brake cutoff: interrupts motor drive when its switch and control logic operate as intended
Electrical-system certification does not validate a braking technique. This drill therefore relies on the exact motorcycle manual, a qualified instructor’s method and a mechanical inspection—not a general electrical standard.
The drill has to keep working when regeneration is weak, delayed, unavailable, or configured differently. Never change a regeneration setting in the middle of a measurement set.
Add Surface Changes Only After the Base Drill Is Stable

Hardpack vs Loose Gravel
Hardpack returns more repeatable feedback, which is what a drill needs. Loose gravel allows more tire movement, and a wheel that locks or slides on it is harder to recover.
Dry vs Wet Ground
Water, mud, wet leaves, painted markings, roots and polished rock all change traction abruptly. A clean stop on dry ground establishes nothing about the same stop in the wet.
Straight-Line Stop vs Corner Entry
Keep emergency braking and emergency swerving apart. Maximum braking while steering or leaning is a different traction problem and it deserves its own session. Straight-line stops only, for now. Straighten-and-stop and brake-then-swerve decisions come later.
Verify the Motorcycle Before Running the Drill
Practice relevance is not a ranking. Nothing below is ordered by claimed stopping distance, because no honest comparison of that kind survives a change of tire, surface or rider.
|
Model |
Practice-Relevant Characteristics |
Reader Consideration |
|
48V 3,840W geared mid-drive motor, modes at 22 / 32 / 40 mph, 28.3 in seat, 126 lb net |
Lower mode and compact size can suit first-stage practice, though adult fit needs assessing in person |
|
|
60V 5,600W geared motor, 177 lb-ft torque, 52 mph, 143 lb net, Volt Green or black |
Learn the selected mode’s verified low-speed response before adding pace; peak torque alone does not predict grip response |
|
|
Sur-Ron Light Bee X |
Hydraulic disc brakes, regenerative braking, light platform |
Familiar in training circles, deep aftermarket, commercial comparison not relevant to this drill |
|
Talaria Sting R MX4 |
Hydraulic brakes, larger rotors, adjustable regeneration |
Adjustable deceleration means the chosen setting should stay fixed across a set |
|
Sur-Ron Ultra Bee |
Higher output, hydraulic discs, selectable power modes |
More mass and power to manage, better suited to consolidation than first sessions |
The EM-5's geared motor multiplies torque through reduction gearing, so pull arrives low in the rev range even in the softest of its three modes. Every rider must demonstrate clean throttle closure on the exact motorcycle and surface before pace increases. Valtinsu's live EM-5 product page lists 3,840W peak, 148 lb-ft, three speed levels and 40 mph.
One caveat. The EM-5's 13+ rating says nothing about whether a 28.3-inch seat and a 126-pound bike fit a particular adult. Sit on it first.
The EM-5 Pro is the other end of that comparison, 18+ only, 5,600W peak, 287 lb rated load. Riders moving up are not learning the drill again. They are relearning where the cue falls. Weighing the two is easier side by side across the full lineup, and our safety gear checklist covers the protective equipment a closed range session assumes you own.
Stop the Session When Control or Equipment Changes
End the drill when any of this shows up:
- The throttle does not return normally
- Motor output continues after the expected cutoff input
- Brake feel changes between runs
- A lever, pedal, cable, hose, rotor or caliper appears damaged
- The motorcycle pulls unexpectedly to one side
- Cues get missed repeatedly
- Vision drops toward the front wheel
- Hands or arms go rigid
- The rider starts chasing shorter distances
- Heat, dehydration, fear or fatigue is affecting coordination
- Another person, vehicle or animal enters the range
- Surface conditions change
Wanting one final attempt is not a reason to resume.
Conclusion
An electric dirt bike emergency braking drill advances only as fast as the rider can preserve the same clean sequence. Walking-pace work teaches where the controls live. Low-speed repetitions connect throttle closure, cutoff behavior, brake pressure, vision and balance into one action. Coach-cued and moderate-pace stops test whether that holds when urgency arrives.
The final target is the shortest controlled stop the rider can repeat under standardized conditions without lockup, slide, loss of line or exhausted runoff. Technique is stabilized first; distance improvement comes second.
Work the progression with a qualified coach first. Then consider whether the EM-5 fits your trail-control development, and our 2026 buying guide if another model suits your terrain better.
FAQs
What is the safest way to practice emergency braking on an electric dirt bike?
Practice only on a legal closed range with consistent traction, a straight marked lane, full protective gear, and clear runoff. Build the drill in this order:
- Verify throttle closure, brake operation, tire condition, and the model’s brake-cutoff or ABS behavior.
- Begin at walking pace and stop on a coach’s cue.
- Close the throttle, keep the motorcycle straight, and apply both brakes progressively.
- Increase pace only after several repeatable stops with no lockup, slide, line change, or intervention.
Should you use the front or rear brake in an emergency stop?
Use both brakes unless the exact model manual or a qualified instructor directs otherwise. Their roles are different:
- The front brake can provide substantial stopping force as load transfers forward, but abrupt input can exceed available grip.
- The rear brake adds stopping force and stability, but it can lock more easily as rear-wheel load decreases.
- The correct balance changes with traction, slope, tire condition, motorcycle design, and rider position; a fixed percentage is misleading.
What should you do if a wheel locks or starts to slide during practice?
Treat any lockup or slide as a failed repetition, not a target. Close the throttle, keep the motorcycle as straight as possible, reduce the locking brake input enough to restore rolling grip, and end the run; then inspect the course and review the recovery with an instructor before restarting at walking pace.
Can regenerative braking replace the mechanical brakes?
No. Regenerative braking is supplemental and may vary with speed, battery state, temperature, controller settings, or system limits, so emergency stopping still depends on functional mechanical brakes and deliberate throttle closure.
Why does the brake lever feel different after repeated stops?
A change in lever travel, resistance, sound, rubbing, or stopping response can indicate heat, adjustment, hydraulic, cable, pad, rotor, or control-sensor problems. Stop the drill and inspect the motorcycle under its exact service manual; do not keep riding to see whether the symptom disappears.
Sources
- Motorcycle Safety Foundation, DirtBike School (2026)
- Motorcycle Safety Foundation, Tips & Practice Guide for the Off-Highway Motorcyclist (2023)
- Motorcycle Safety Foundation, Library (2024)
- National Highway Traffic Safety Administration, A Study of Motorcycle Rider Braking Control Behavior (2011)
- UL Solutions, E-Bikes Certification: Evaluating and Testing to UL 2849 (2026)


Looking for something else?

Electric Dirt Bike Loses Power Under Load: Causes and How to Fix It
LEARN MORE
Electric Dirt Bike Bolt Torque Checklist: What to Check and Where the Numbers Come From
LEARN MORE
How to Bleed Electric Dirt Bike Brakes Safely
LEARN MORE
Electric Dirt Bike Throttle Not Working: What to Check First
LEARN MORELooking for something else?

Electric Bike Battery Not Charging? Work Through This Before You Buy a New One
LEARN MORE
Electric Dirt Bike Error Codes: What They Mean and What to Check First
LEARN MORE
Electric Dirt Bike Brake Rotor Rubbing: Diagnose the Cause Before Adjusting
LEARN MOREYou may also like
Moto eléctrica todoterreno para adultos EM-5 con luz
VALTINSU EM-5 Pro Off-Road Black Electric Dirt Bike
VALTINSU EM-5 Pro Green Electric Dirt Bike
Further reading

Electric Dirt Bike Trailside Power Loss: Recovery Plan When the Battery Is Dead

Electric Dirt Bike Fall Riding on Wet Leaves: Grip, Hidden Obstacles and Braking

How to Lift a Fallen Electric Dirt Bike Without Hurting Yourself or the Bike
