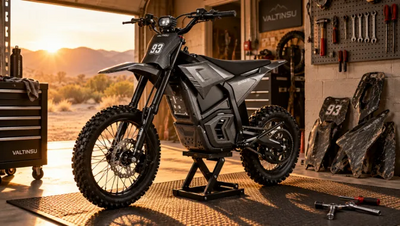
How to Bed In Electric Dirt Bike Brakes for Consistent Stopping Power
Brake bedding establishes an even pad-material transfer layer on the rotor and helps the brake respond consistently. The safe sequence is component-specific: use the instructions for the installed pads, rotor and brake system instead of copying speeds or repetition counts from unrelated hardware.
Treat bedding as a controlled maintenance check, not a performance test. Work only in a legal area with clear sightlines and stable traction, and stop if the lever sinks, fluid is visible, the brake drags or braking deteriorates.
What Brake Bedding Actually Does
Bedding is controlled conditioning. You apply the brakes repeatedly under moderate, progressive load so that friction material migrates from the pad onto the rotor in a consistent layer.
Two things happen at once. The pad surface mates to the rotor, wearing off high spots and the manufacturing skin new pads carry. And the rotor picks up that film, which changes the character of the friction.
Abrasion versus adhesion
Brake friction is generated two ways. Abrasive friction is pad material scraping against bare iron. Adhesive friction is pad material gripping a deposited layer of its own compound. A DBA technical bulletin describes the adhesive mechanism this way: the pad deposits an even transfer layer that bonds to the iron surface under heat and pressure, and the pad then grips that layer to generate resistance.
An even transfer layer can improve repeatability. If braking remains weak, inconsistent, noisy or progressively worse after the specified procedure, stop and inspect for setup, contamination, wear or hydraulic faults instead of assuming more bedding will solve it.
Why New Electric Dirt Bike Brakes Can Feel Different

A fresh pad on a fresh rotor has very little real contact area. Machining marks, uneven pad faces and a rotor with no film on it mean you are pulling hard for less result than you expect.
Riders describe it three ways:
- Initial braking force is lower than expected.
- Braking force builds unevenly instead of progressively.
- Noise or light vibration appears while the surfaces mate.
These symptoms may appear while surfaces are conditioning, but they should improve through the manufacturer procedure. A sinking lever, visible fluid, heavy drag, grinding or worsening performance is not normal bedding; stop and inspect.
Published vehicle speed, weight or climb figures do not determine a bedding procedure. Use instructions for the exact brake hardware fitted to the bike. The EM-5 Pro product page identifies the model, while Valtinsu parts and accessories lists available brake assemblies and rotors. Confirm compatibility and the component procedure before riding.
Understanding the Brake Pad Transfer Layer

The brake pad transfer layer is a microscopically thin coating of pad compound bonded to the rotor face. It is why a properly bedded brake builds force smoothly instead of grabbing.
Without it, pad material grinds against bare steel. With it, pad material meets a surface of essentially its own compound, and that pairing produces friction that rises in proportion to lever pressure.
The layer has to be even. That is the part riders get wrong.
Holding a hot pad against one rotor position can leave a localized deposit and create lever pulsation that resembles rotor runout. Inspect both the transfer pattern and rotor condition before diagnosing a warped rotor.
Why Component-Specific Instructions Matter

Bedding follows a common principle, but the exact speed, repetition count, braking force and cooling interval vary with the installed pad, rotor and brake system. Do not transplant a procedure from unrelated hardware.
Hardware and pad compound set the procedure
Rotor dimensions, pad compound, caliper design and the manufacturer's burnishing targets affect how heat is introduced and released. A product-specific procedure accounts for those variables.
Published vehicle speed, weight or climb ratings do not reveal the correct bedding sequence and should not be used to invent one.
Use the bike manual and the brake-component maker's instructions. If they conflict or the fitted components cannot be identified, contact Valtinsu support before proceeding.
Surface and access still matter
Use only a controlled, legal area with consistent traction and clear sightlines. Loose or changing ground can trigger tire slide before the brakes receive the intended load.
If you cannot follow the manufacturer procedure without traffic, blind corners or unstable footing, choose another location rather than improvising.
Before You Bed In: What to Check First

Bedding a brake that is not correctly assembled just bakes the problem in. Two checks come first, and neither one requires opening anything.
Keep the friction surfaces clean
Do not touch the pad face or the rotor with bare fingers. Skin oil is a contaminant, and it does not burn off. If the rotor has been handled, wipe it with a clean lint-free cloth and isopropyl alcohol before you ride, and let it dry fully.
The same applies to whatever you were doing before you got to the brakes. If you have just lubed the chain, wash your hands before you go anywhere near the caliper.
Confirm the brakes are actually ready
Spin each wheel and listen. It should turn freely without the pad dragging on the rotor. Pull each lever and feel for a firm stop rather than a lever that sinks slowly toward the bar. Look at the caliper, hose and lever for any trace of fluid.
If any of that looks wrong, stop there. Check the assembly and inspection steps in the Valtinsu user manuals and contact after-sales support rather than riding to see whether it improves. A brake that drags or a lever that sinks is not a bedding problem.
How to Bed In Electric Dirt Bike Brakes Without Guessing the Numbers
Here is where this guide has to be direct about what it will and will not give you.
The general principle
Across hydraulic disc brake systems, the published approach is a series of progressively firmer slowing manoeuvres from moderate speed, releasing the lever before the machine comes to a complete stop, with cooling allowed between repetitions. You are building heat gradually and steadily rather than spiking it, and you are never holding pressure at a standstill.
Three things carry across every published procedure worth reading:
- Build up. Early applications are gentle. Force increases as the surfaces mate.
- Release before you stop. Rolling off the lever prevents a hot pad parking on one spot.
- Let heat out between repetitions. Continuous dragging cooks the pad surface instead of conditioning it.
Published procedures are product specific, which is exactly why you should not borrow one. The Shimano disc brake manual instructs riders of its bicycle hydraulic disc brakes to accelerate on flat, obstacle-free ground, brake down to walking pace one lever at a time, and repeat at least twenty times per brake, noting that braking force increases as the process goes on. That is a component manufacturer publishing figures for its own bicycle hardware. It is a useful illustration of the shape of the process. It is not a procedure for an adult off-road motorcycle.
The principle is recognised in regulation too. Under FMVSS No. 122, the federal standard for motorcycle brake systems, brakes are burnished before their performance is evaluated at all, and adjusted afterwards per the manufacturer recommendation. That standard covers street-legal motorcycle categories rather than off-road-only machines, so it is not a compliance requirement for your bike. Worth knowing anyway: regulators do not treat green brakes as representative of a brake system, and neither should you.
What only your manual can tell you
The correct speeds, the number of repetitions and the cooling intervals for your machine depend on your pad compound, your rotor and your bike. Those figures come from the manufacturer. For a Valtinsu, that means the Valtinsu user manual for your model and Valtinsu after-sales support. If you have fitted aftermarket pads, the pad manufacturer instructions take precedence for those pads.
Nothing in bedding involves opening the hydraulic system. It is a riding procedure. Bleeding, caliper alignment and component replacement are separate jobs, and the parts catalogue itself recommends a qualified technician for brake component work.
Where to do it

Choose a controlled, legal off-road area with clear sightlines, stable traction and no other traffic. Do not use public roads or shared trails with blind corners.
If the area is public land, verify that OHV use is permitted and follow local rules before you begin. A maintenance drill does not change the bike's legal classification.
Surface matters more than space. You want firm, consistent ground with grip, because loose sand or gravel means the tyre breaks traction before the brake ever reaches the pressure you are trying to build. Full gear, as always.
What Properly Bedded Brakes Should Achieve
You are looking for repeatability rather than raw force. Run through this before you call the job done.
|
Check |
What you want to see |
What it suggests if absent |
|
Brake lever |
Bite point in the same position on every pull |
Air in the system, or bedding not yet complete |
|
Force build-up |
Rises in proportion to how hard you squeeze |
Glazed pad surface or incomplete transfer layer |
|
Repeat pulls |
Later applications feel consistent with earlier ones |
Heat management issue, contamination or fade |
|
Rotor face |
Even, uniform colour across the swept area |
Patchy or uneven material deposit |
|
Vibration |
No pulsing through lever or bars under steady pressure |
Uneven deposits, or a rotor out of true |
|
Noise |
No grinding from the caliper |
Pads worn to backing, or debris in the caliper |
|
Fluid |
No weeping or residue at lever, hose or caliper |
Stop riding. Have the system inspected |
Do not use stopping distance as your benchmark. Surface, tyre condition, rider weight, gradient and speed all move that number, and chasing a shorter figure encourages exactly the hard, panicked braking that bedding exists to keep you from needing.
Common Brake Bedding Mistakes to Avoid
- Holding the lever at a complete stop while the rotor is hot. This is the single most common cause of uneven deposits.
- Going to maximum effort on the first pull rather than building up to it.
- Dragging the brake continuously instead of applying and releasing. That cooks the pad surface and can glaze it.
- Bedding one brake and forgetting the other. Front and rear are separate systems and each needs the process.
- Skipping bedding on a pad-only change. SRAM notes that bed-in must be repeated every time new pads or rotors go on, and that skipping it costs power and invites noise.
- Doing it on a loose surface where the tyre lets go before the brake loads up.
- Treating a bicycle procedure as transferable, for the reasons above.
Contamination: The Mistake You Cannot Ride Out

Incomplete bedding can cause inconsistent brake feel, but oil or brake fluid in porous pad material is a different problem. Do not try to correct suspected contamination by adding heat.
Where contamination comes from
The usual suspects are all things you keep in the same garage as the bike:
- Chain-lube overspray.
- Degreaser or penetrating oil drifting onto the rotor while you work on something else.
- Brake fluid during a bleed, which soaks straight into the friction material.
- Silicone sprays and tyre shine, applied nearby with the best intentions.
- Bare fingers on the pad face during a pad change.
What to do about it
A rotor can often be cleaned using the brake maker's approved method. Porous pad material contaminated by oil or brake fluid normally requires replacement; follow the component maker's guidance rather than trying to burn contamination away.
Suspect contamination when the brake squeals persistently, feels greasy or never regains normal bite after the specified bedding procedure. Stop repeating hard stops and inspect the pads and rotor.
Prevention is cheap. Mask the rotor with a rag when you spray anything on the drivetrain, wipe the rotor afterwards, and handle new pads by the backing plate.
How to Tell When Something Is Wrong

Bedding should make things better. If it makes them worse, that is information. Stop and work out which of these you are looking at.
|
What you notice |
Commonly associated with |
What to do |
|
Lever pulls to the bar or grip |
Air in the system, fluid loss, or pads worn out |
Stop riding. Inspect before further use |
|
Spongy lever that softens progressively |
Air in the system or fluid condition |
Stop riding. Route to the manual or a technician |
|
Fluid weeping at lever, hose or caliper |
Seal, fitting or hose fault |
Stop riding immediately. Do not ride to test it |
|
Brake drags after you release |
Caliper or piston not returning |
Stop riding. Have the caliper inspected |
|
Burning smell with reduced stopping force |
Overheated pads, possible glazing |
Stop and let it cool. Inspect before continuing |
|
Grinding from the caliper |
Pads worn to the backing plate, or debris |
Stop riding. Inspect pad thickness |
|
Pulsing once per wheel revolution |
Uneven deposits, or rotor out of true |
Inspect the rotor face before assuming it is warped |
|
Squeal that will not go away |
Contamination or glazing |
Inspect pads. Cleaning rarely saves a soaked pad |
None of these are things to ride out, and none of them are fixed by more bedding laps.
When to Stop Riding and Have the Brakes Inspected
Any symptom in the table above is a stop-and-inspect situation. So is a rotor with visible scoring, bluing or cracking, and so is a pad worn down toward its backing plate.
Check the inspection points and wear limits for your model in the Valtinsu user manual, and go to Valtinsu after-sales support or a qualified motorcycle technician for anything involving the hydraulic system. Brakes are the wrong component to learn on. Better to lose a weekend waiting on a part than find out halfway down a descent.
Worth building the habit: check pad thickness and rotor condition as part of your routine rather than only when something feels off. Pads are a consumable, and how quickly they go depends entirely on how and where you ride.
Bedding In Again After a Pad or Rotor Change
Bedding is not a one-time event in the life of the bike. It is a step that belongs to every new pair of pads and every new rotor.
The reason is the film. A rotor that has been running one pad compound carries a transfer layer made of that compound. Fit a different pad and the new friction material meets a film it did not deposit, so the two surfaces are mismatched until they re-mate. SRAM states the requirement plainly in its brake service guidance: repeat bed-in whenever new pads or rotors are installed, and expect reduced power and more noise if you skip it.
Practical version:
- New pads on an existing rotor. Bed in again. Expect it to take a little longer if the old pads were a different compound.
- New rotor with existing pads. Bed in again. The rotor has no film at all.
- Both new. Bed in as though the bike were new, because as far as the brakes are concerned it is.
Front and rear count separately here as well. Replacing one does not condition the other.
Keeping Brake Performance Consistent After Bedding
The transfer layer is not permanent. It wears, and it can be disrupted.
Water, mud and dust can temporarily change friction or leave debris on the surfaces. After the bike is clean and dry, a low-speed check should return to the usual bite. A persistent change requires inspection.
Three habits do most of the work:
- Keep lubricants away from the rotor and pads when you service the chain. Mask the rotor if you are spraying anything.
- Let the brakes cool at the bottom of a long descent instead of parking with the lever held.
- Replace pads when they reach their limit and bed the new set in properly.
How your terrain changes the picture
Where you ride determines how often this comes up. Two riders on identical machines can be on completely different pad replacement schedules.
- Dry, dusty desert ground. Abrasive grit accelerates pad wear and scrubs at the film. Check pad thickness more often than you think you need to.
- Long mountain descents. Sustained heat is the dominant factor. Let the brakes cool at the bottom rather than parking on the lever.
- Wet, muddy trail. Water and silt strip the film temporarily. Expect a few vague pulls after a crossing, then normal feel returning.
- Flat, hardpack riding. The easiest life a brake can have, but also where riders forget to inspect anything at all.
Valtinsu Resources and Replacement Parts
Model-specific figures, service intervals and the maintenance steps Valtinsu actually specifies live in the Valtinsu user manuals. Where the manual differs from anything general in this guide, follow the manual. It was written for your hardware.
If you are stocking spares before a riding season, brake components sit in the Valtinsu parts and accessories collection under Controls and Brakes, alongside chargers, displays, chains and body panels. The collection carries its own installation guidance, and it is worth reading: power the bike off before installation, do not force parts that will not align, and use a qualified technician for brake, throttle, wiring or drivetrain work if you are not confident.
FAQs
Do I need to bed in new pads, a new rotor, or both?
Yes. Bed the system whenever either friction surface changes, following the exact procedure for the installed brake components.
- New pads on an existing rotor: bed them in again.
- Existing pads on a new rotor: bed them in again.
- New pads and a new rotor: complete the full manufacturer procedure.
If the new pads use a different compound, ask the component maker whether the old transfer layer must be removed before bedding.
Should every bedding application end in a complete stop?
No. Unless your component manual explicitly says otherwise, release the brake before the bike stops so a hot pad is not held against one rotor position. Use the speeds, repetitions, force progression and cooling intervals in the component manual; do not substitute figures from another brake system.
How do I know the brakes are bedded in?
Bedding is complete when the brake response becomes repeatable, not when a fixed number of laps has passed. Confirm all of the following:
- The bite point is consistent from pull to pull.
- Braking force builds progressively with lever pressure.
- Repeated applications do not introduce new pulsing, grinding or a persistent loss of power.
- The rotor swept area looks even rather than patchy.
If the response remains weak or worsens, stop and inspect instead of adding harder stops.
Can wet or muddy riding undo brake bedding?
It can temporarily change brake feel and leave abrasive debris on the surfaces, but one wet ride does not automatically require a full re-bed. After cleaning and drying the bike, test at low speed in a controlled area. If normal bite returns, continue monitoring; if the change persists, inspect the pads and rotor for grit, glazing, uneven deposits or contamination.
Can contaminated or glazed pads be re-bedded?
Not always. Re-bedding is not a repair for oil- or brake-fluid-soaked friction material.
- If the pads are contaminated: replace them as directed by the component maker, clean the rotor with an approved method and correct the contamination source.
- If the pads appear glazed: follow the brake maker's inspection guidance; replace them if damage or reduced braking persists.
Do front and rear brakes need to be bedded separately?
Yes. Front and rear are separate systems, so condition each one according to the manufacturer procedure and verify each independently. Do not assume a normal-feeling front brake proves the rear is ready, or vice versa.
Before Your Next Ride
Complete bedding only when brake response is repeatable and the inspection checks pass. Do not treat bedding as a cure for leaks, a sinking lever, dragging, grinding, contamination or damaged components.
Repeat the procedure whenever the applicable component maker requires it after a pad or rotor change, and verify the front and rear systems separately.
Use the Valtinsu user manual for model-specific inspection points and the brake-component instructions for procedure numbers. If the fitted hardware or guidance is unclear, contact support before riding.
Sources
- Valtinsu, Valtinsu User Manuals. Not stated on source. Page verified live 11 Aug 2026. Model-specific manuals for EM-5, EM-5 Pro, EM-5 Ultra and EM23; authority for machine-specific maintenance and inspection.
- Valtinsu, Parts and Accessories. Not stated on source. Page verified live 11 Aug 2026. Controls and Brakes category, brake levers, brake assemblies and front brake rotor availability, installation guidance.
- Valtinsu, EM-5 Pro product page. Official model reference used to confirm model identity; it does not provide a brake-bedding sequence or substitute for component instructions.
- U.S. Government Publishing Office (eCFR), FMVSS No. 122, Motorcycle Brake Systems. Current eCFR text, retrieved 11 Aug 2026. Burnishing required before brake performance evaluation; post-burnish adjustment per manufacturer recommendation; applicable motorcycle categories.
- Shimano Inc., Hydraulic Disc Brake User Manual (UM-8VR0A-009). February 2022, per document. A published, product-specific bed-in procedure: flat obstacle-free area, one lever at a time, at least twenty repetitions per brake, braking force increasing through the process.
- SRAM LLC, Brake Maintenance Guide. Not stated on source. Retrieved 11 Aug 2026. Bed-in must be repeated whenever new pads or rotors are installed; skipping it reduces power and increases noise; contaminated pads must be replaced.
- DBA (Disc Brakes Australia), Technical Bulletin: Bedding-In Brakes. Not stated on source. Retrieved 11 Aug 2026. Abrasive versus adhesive friction mechanisms; transfer layer bonding to the iron rotor surface under heat and pressure.


Looking for something else?
Electric Dirt Bike Replacement Parts Availability: What Buyers Should Verify Before Ordering
LEARN MORE
How to Check an Electric Dirt Bike for Safety Recalls by Model and Serial Number
LEARN MORE
How to Choose an Electric Dirt Bike Repair Shop: Questions to Ask Before Service
LEARN MORE
How to Lift a Fallen Electric Dirt Bike Without Hurting Yourself or the Bike
LEARN MORELooking for something else?
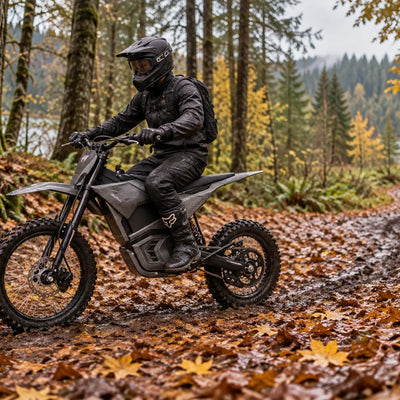
Electric Dirt Bike Fall Riding on Wet Leaves: Grip, Hidden Obstacles and Braking
LEARN MORE
Electric Dirt Bike Trailside Power Loss: Recovery Plan When the Battery Is Dead
LEARN MORE