Electric Dirt Bike Tire Pressure: How to Find the Right PSI
There is no universal electric dirt bike tire pressure. The correct cold PSI starts with the specification for your exact bike, rim, tire, and tube or tubeless setup; rider load and terrain may justify small changes only within those approved limits.
If a guide gives one PSI without identifying the motorcycle and tire, treat it as a rough reference rather than a setting.
This guide shows you where the real number lives, how to read the marking on your sidewall correctly, and how to adjust safely once you have a baseline. An adult electric off-road motorcycle is not a commuter bicycle, so PSI charts for fat-tire e-bikes do not apply.
Work from the exact hardware outward: model documentation, frame or swingarm label, tire maker data, rim limits, then manufacturer support. Record separate cold front and rear baselines instead of adopting a generic online number.
Quick Answer: What PSI Should an Electric Dirt Bike Use?

Start with the manufacturer's specified cold front and rear pressures. Do not copy a bicycle e-bike chart, another dirt bike's setup, or the maximum number molded into the sidewall; those numbers answer different questions.
Three things decide it, in this order: what the motorcycle maker specifies, what the tire itself permits, and what your load and surface call for inside those limits.
Check the owner's manual, pressure label, tire documentation, and any rim limit before riding. Online ranges can explain tradeoffs, but they do not override specifications for your hardware.
|
Source |
What it gives you |
How much weight to give it |
|
Motorcycle owner's manual or frame placard |
Cold front and rear pressure for your model and load |
Highest. This is the number to set |
|
Tire sidewall marking |
A pressure limit, sometimes a range |
Hard ceiling you never cross |
|
Tire manufacturer data for your exact tire |
Approved operating pressures for that casing |
High, especially after a tire change |
|
Manufacturer support or dealer |
The spec when the manual is silent |
High. Ask rather than guess |
|
Generic online PSI charts |
A rough sense of the ballpark |
Reference only; never overrides the sources above |
Start With the Motorcycle Manufacturer's Specification
Check the owner's manual, any pressure label on the frame or swingarm, and the service information for your model. If none of those give a figure, contact the manufacturer before you set anything.
The cited EM-5 manual requires a pre-ride pressure check but does not provide one universal PSI in that section. If your exact documentation is silent, use the complete tire and rim markings and ask Valtinsu support for the model-specific cold front and rear figures.
Do Not Treat Tire Size as a PSI Specification
Two tires with identical dimensions can have different casing construction, load ratings, pressure limits, and intended surfaces.
Size refers to the tire's shape. It does not describe how much air that tire wants.
Treat Generic PSI Charts as Reference Only
You will see confident ranges published for dirt bikes, fat tires, and commuter e-bikes. They are averages drawn from other machines.
None of them know your rim width, tube setup, load rating, or terrain. Use them to double-check a figure, never to set one.
Understand What the Number on the Tire Sidewall Means

A sidewall marking may be a maximum, a maximum at a stated load, or an approved range. It is not automatically the motorcycle's normal operating pressure.
The second group is closer to right.
Maximum Pressure Is Not Automatically Operating Pressure
Dunlop states it plainly: the pressure on the sidewall is a maximum for that tire and may not match the recommended pressure for your motorcycle. Follow the tire maker's or the motorcycle maker's recommendation instead.
A structural limit and an operating target are different. Using the maximum as a default can reduce compliance and grip, while going too low can damage the tire, tube, bead, or rim.
Some Tires Show a Range Instead
Not every marking means the same thing. Some tires carry a single maximum, some carry a minimum and maximum, some carry a recommended figure alongside the limit.
Read exactly what yours says before you act on it. Photograph it so you are not working from memory later.
Never Exceed Tire or Rim Limits
Whatever you decide, stay inside the limits stated for the tire, the rim, the motorcycle and the tube. The lowest of those limits is the one that governs.
Dunlop also notes that overinflating does not increase load-carrying capacity. If you are carrying more weight, more air is not a workaround for a load limit.
Why Electric Dirt Bike Tire Pressure Matters
Pressure is not a comfort setting. It changes how the machine behaves in ways you can feel within the first hundred meters.
Traction and Contact With the Ground

Pressure controls how much the tire deforms and what shape that footprint takes. On loose or uneven ground, a tire that can conform to the surface finds grip that a rigid one skates over.
Too little air and the casing moves more than the tread does. Grip becomes unpredictable rather than better.
Steering and Stability
Underinflation lets the tire squirm under side load, which makes steering feel vague and slow to respond.
Overinflation does the opposite. The tire stops absorbing small irregularities and starts deflecting off them, so the front end wanders on rocks and roots.
Impact and Rim Protection
Air is the cushion between a rock and your rim. Run very low, and there is less of it, so hard edges can reach the rim and pinch a tube against it.
This is the risk that limits how far down you can go, no matter how much grip you might gain.
Ride Comfort
Suspension handles most wheel travel, while the tire filters small, sharp surface irregularities. Pressure that is too high can increase deflection; pressure that is too low can let impacts reach the rim.
Change pressure, and you will notice the harshness of washboard and gravel change with it, even with the suspension untouched.
Determine Your Correct Starting Pressure
Treat this as a short procedure you run once, then keep on record. It replaces guessing permanently.
Check the Owner's Manual First

The manufacturer figure is your baseline, because it accounts for the machine's weight, geometry, and intended use.
If the manual has no figure, do not substitute a chart. Ask Valtinsu support for your model's cold pressure with your order number and tire details, and keep the reply. That written answer becomes your spec.
Identify the Exact Tire
Write down the brand, model, full size marking, construction, and every pressure marking, for front and rear separately. They are often different tires.
One point worth flagging on Valtinsu bikes: the published specs list wheel diameters, such as 17-inch front and 14-inch rear, but not tire model or section width. A wheel diameter alone cannot give you a pressure, so the marking on your own tire matters more than the spec sheet here.
Confirm Tubed or Tubeless Setup
Pressure limits and failure modes differ between the two. A tubed setup adds pinch-flat risk at low pressure that a tubeless setup handles differently.
Advice written for tubeless mountain bike tires does not transfer to a motorcycle-style tire with a tube.
Include Rider and Cargo Weight
The tire carries the whole loaded machine, not just you. Bike weight, rider, gear, tools, pack, and anything strapped on all count.
Count the bike, rider, protective gear, tools, and cargo. Manufacturer range-test rider weight is not a tire-pressure specification, so do not use a marketing range condition to set PSI.
Adjust PSI for Rider Weight and Total Load

Total load is one reason two otherwise identical bikes may need different values within the approved range.
Heavier Loads Increase Tire Deflection
More weight squashes the tire further at the same pressure. A setting that felt supportive for a light rider can feel soft and vague once load goes up.
Michelin's guidance follows the same logic: manuals typically specify a higher pressure for loaded conditions, then a lower one for solo riding.
Avoid Automatically Using the Maximum
Do not respond to extra load by jumping to the sidewall maximum. Increase only when the vehicle or tire documentation supports it, then evaluate handling and rim protection.
Extra load may justify moving up inside approved specifications. It does not turn the ceiling into the correct target.
Account for Front-to-Rear Load Distribution
The two wheels rarely carry equal weight. Rider position, motor and battery placement, braking and any cargo all shift the balance rearward or forward.
Do not assume equal front and rear pressure unless your manufacturer specifies it.
Adjust Tire Pressure for the Riding Surface
Terrain can justify a small adjustment only inside the approved pressure range. The goal is predictable support and grip, not the lowest possible number.
Notice what the table does not contain: numbers. What you are looking for is a behavior, and behavior is what you tune against.
|
Surface |
What good pressure feels like |
What goes wrong at the extremes |
|
Hardpack and firm dirt |
Supportive, predictable steering, tire still following small ruts and edges |
Too high skates over loose top layer; too low feels vague in corners |
|
Rocks and roots |
Enough compliance to absorb edges without the rim being exposed |
Too high deflects off rocks; too low invites rim strikes and pinch flats |
|
Sand and loose soil |
Tire footprint able to float rather than dig, drive still hooking up |
Too high spins and digs; too low risks bead and rim damage under side load |
|
Mud |
Tread able to clear itself and reach firmer ground below |
Pressure cannot fix a tread pattern that is wrong for mud |
|
Pavement or road links |
Stable, even wear, no squirm under braking |
Sustained low pressure builds heat and wears edges quickly |
Hardpack and Firm Dirt
Look for controlled support with enough compliance that the tire keeps contact over small irregularities rather than skipping across them.
Rocks and Roots

This is the balance that matters most. You want compliance for grip, but enough air left to keep hard edges away from the rim and the tube.
If you are collecting rim marks or pinch flats, you have gone too far down, no matter how good the grip felt.
Sand and Loose Soil

A slightly larger footprint may help in loose soil, but a large pressure drop raises bead, rim, tube, and steering risks. Make one small change and return to baseline if support gets worse.
Side loads in sand are hard on beads. That is the failure to respect.
Mud
Tread design and tire construction often influence mud performance more than a small pressure change. Pressure cannot turn a hard-terrain tire into a deep-mud tire.
Letting air out will not turn an unsuitable tire into a mud tire. Trail access matters too, since wet trails are often closed for good reason.
Pavement or Road Connections

A paved connection is a different duty cycle from the trail. Follow the road-use guidance for the exact tire and bike; a larger wheel diameter alone does not establish the correct road pressure or legal classification.
Before using any public pavement or road connection, verify the bike's classification, required equipment, registration, and the rules of the jurisdiction and land manager. Do not infer legality from tire pressure or product category.
Should Front and Rear Electric Dirt Bike Tires Use the Same PSI?

Often no, and treating them as one number is a common mistake.
Front and Rear Loads Are Different
Geometry, rider position, battery and motor placement, braking, acceleration, tire size, and cargo can load the two ends differently. Use the specified front and rear values instead of assuming one end always needs more pressure.
Use the Specified Front and Rear Values
If your manufacturer gives two figures, use two figures. Do not average them and do not copy one to both wheels.
The MSF T-CLOCS pre-ride checklist has separate front and rear tick boxes for air pressure for exactly this reason.
Change One Variable at a Time
When you are permitted to tune, move one end only, then ride and assess. Change both at once, and you cannot tell which one helped.
Recognize Tire Pressure That Is Too Low
You can diagnose pressure by feel long before you reach for a gauge. Learn these four signals.
Excessive Tire Squirm
Cornering feels vague or unstable, and the tire visibly rolls or folds under side load. The bike seems to settle late into a turn.
Frequent Rim Impacts or Pinch Flats
Repeated bottoming or pinched tubes point to inadequate tire support, though it can also mean a suspension or technique problem.
NHTSA crash research found that tires underinflated by more than a quarter of the recommended figure showed tire problems significantly more often than expected. Underinflation is not a harmless setting choice.
Heavy or Inconsistent Steering
Excess deformation makes the front slow to respond and inconsistent through direction changes. Dunlop links underinflation to imprecise cornering, higher running temperatures and irregular wear.
Stop if the Tire Will Not Hold Pressure
A tire that keeps going soft is not a pressure problem. Look for a puncture, damaged tube, bead issue, valve fault or tire damage.
Repeatedly reinflating and riding hides a fault instead of finding it.
Recognize Tire Pressure That Is Too High
More pressure is not automatically faster or safer on rough ground. Once the tire stops following the surface, the bike can deflect, lose grip, and transmit more impact to the rider and chassis.
Harshness Over Small Bumps
An overinflated tire cannot conform to uneven ground, so every small edge arrives at the bars and pegs undiluted.
Bouncing or Deflection
Watch for the tire skipping sideways off rocks and roots instead of following the surface. That is lost drive and lost steering at the same moment.
Silca's rolling resistance testing makes the underlying point well. Past a breakpoint, losses climb sharply because energy goes into shaking the machine and rider rather than into forward motion. Pressure is not a variable you maximize.
Reduced Grip on Loose Terrain
The highest allowable pressure rarely gives the best off-road traction. A smaller, harder footprint has less to work with on loose surfaces.
Do Not Exceed the Approved Maximum
This is a hard boundary, not a guideline, no matter what rolling feel you are chasing. Dunlop notes overinflation brings a hard ride and accelerated center wear with no gain in load capacity.
Check Electric Dirt Bike Tire Pressure Correctly

A measurement taken the wrong way is worse than no measurement, because you will act on it.
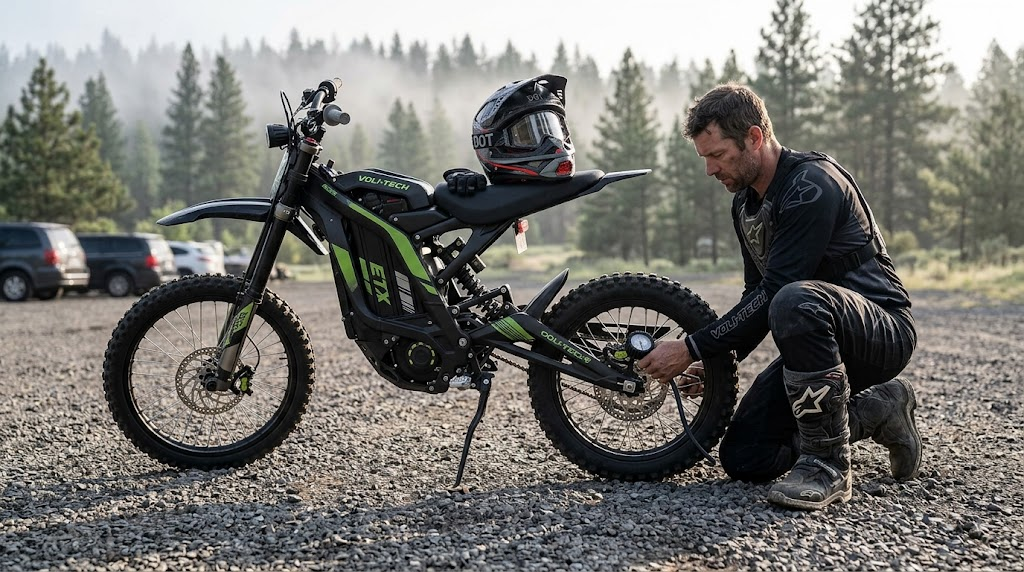
Measure Cold Pressure
Cold means before you ride, not after. Riding heats the tire and raises the reading, so a hot check reads high and leaves you underinflated once things cool.
Michelin is explicit that you should never deflate a tire that has just been ridden. Wait for it to cool and measure again.
Use a Gauge Suited to the Pressure Range
A gauge that reads clearly at your bike's working pressure makes small changes visible. A gauge designed for car pressures may be too coarse for a low-pressure dirt tire.
Use the same gauge every time. Consistency matters more than absolute accuracy when you are tracking changes.
Check Both Tires
Front and rear do not lose air at the same rate. NHTSA notes tires lose pressure gradually over time, so check both rather than assuming.
Record Your Baseline
Record cold front and rear PSI, surface, total load, temperature, and handling notes. A short setup log makes later changes repeatable.
Make Tire Pressure Adjustments Safely
Tuning is fine. Random experimentation is not.
Begin at the Approved Baseline
Start from the approved cold baseline so you have a safe reference to restore if handling gets worse.
Make Small Changes
Move in small steps and ride between them. Large jumps make it impossible to tell what changed and can take you outside approved limits quickly.
Test on Familiar Terrain
Assess steering, traction, bump response, braking feel, and tire support somewhere you know well, before committing to harder ground.
New pressure on unfamiliar terrain gives you two variables and no answer.
Return to Baseline if Handling Gets Worse
Treat every change as a reversible experiment rather than an upgrade. If the bike is worse, put the air back and write down what you learned.
Do Not Mix Electric Bicycle PSI With Electric Dirt Bike PSI
Do not combine commuter e-bike, fat-tire bicycle, and electric dirt-motorcycle values in one chart. Their casings, rims, loads, speeds, and impact demands can be materially different.
Those are three different vehicles with three different tire systems.
Bicycle E-Bikes May Use Much Higher PSI
Narrow commuter and road bicycle tires operate at pressures far above what a motorcycle-style dirt tire wants. Copying a road e-bike figure onto a dirt bike would be badly wrong in one direction.
Fat-Tire E-Bikes Are Still Not Dirt Motorcycles
A 20x4 or 26x4 bicycle tire has bicycle construction, bicycle rims, and bicycle load characteristics. Wide does not mean motorcycle.
Fat-tire pressure guidance is genuinely useful, just not for this vehicle.
Electric Dirt Bikes May Use Motorcycle-Spec Tires

Wheel sizes differ across a lineup too. You can compare wheel setups across the four-model range and see three different combinations, which is a fair signal that one pressure figure was never going to cover them all.
Follow the motorcycle and tire data rather than a bicycle pressure calculator.
Tire Size Examples: Why Size Alone Cannot Give You the PSI
These get searched constantly, so here is the straight answer for each.
120/80-19 Dirt Bike Tires
120/80-19 is a dimension, not a pressure. It tells you section width, aspect ratio, and rim diameter, and nothing about air.
Tire model, casing, motorcycle, tube setup, load, and terrain all still apply.
20x3 E-Bike Tires
A 20×3 marking is commonly associated with bicycle-style tires, but classification depends on the actual tire and rim system. Use documentation for that exact combination rather than assuming this motorcycle guide applies.
Do not assign it a dirt bike pressure based on width.
Replacement Tires May Change the Requirements

Fitting a different tire model or construction can change the approved pressures completely. Recheck the new tire's data instead of carrying the old number over, and source replacement tubes and consumables that match your wheel and valve setup.
Also worth knowing: the EM-5 Pro and the flagship share a 17-inch front and 14-inch rear, while the entry model runs 14 and 12: same brand, different wheels, different tires.
Recheck Pressure When Conditions Change
A baseline is not permanent. Three things reset it.
Temperature Changes
Air pressure moves with temperature, which is why cold readings taken in similar conditions are the only ones worth comparing.
A bike set in a warm garage and ridden on a cold morning is not at the pressure you set.
Added Gear or Cargo
Carrying substantially more weight changes the load on both tires. Revisit the manufacturer's loaded guidance rather than riding the solo figure.
New Tires or Tubes
A replacement component may have different limits from the one it replaced. Check the new markings, and recheck pressure after the first ride once everything has settled.
When to Stop Adjusting PSI and Inspect the Tire

Pressure cannot fix a mechanical problem, and chasing one with a pump wastes time.
Repeated Pressure Loss
Look for a leak, puncture, valve core problem, tube damage, or a bead that is not seated. Dunlop notes that repeated pressure loss can also come from undetected tire damage.
Visible Tire or Rim Damage
Cuts, exposed casing, bulges, blisters, damaged beads, or a bent rim all need inspection before another ride, not more air.
Persistent Handling Problems

If correct pressure does not settle the bike, look further. Tire condition, wheel trueness, bearings, suspension setup and alignment all produce symptoms that feel like a pressure problem. The wheel and bearing checks in the MSF T-CLOCS routine are a good structure for this, and the EM-5 Pro's 17-inch front and 14-inch rear setup is worth confirming against what is actually fitted if the bike has been apart.
Final Takeaway
There is no universal electric dirt bike PSI: the correct value depends on the exact motorcycle, tire construction, rim, load, and approved setup.
The process is what transfers. Identify the exact machine and tire, start from the manufacturer's cold specification, account for total load and terrain, measure with a gauge suited to the range, and make only small controlled changes inside approved limits.
Write the numbers down. Over time, a cold-pressure log tied to your bike, load, and terrain becomes more useful than a generic chart while still staying inside approved limits.
FAQs
What PSI should an electric dirt bike use?
Use the cold front and rear pressures specified for the exact motorcycle, rim, tire, and tube or tubeless setup. A generic PSI chart cannot replace the manual, a vehicle placard, the tire maker's data, or manufacturer support.
The number molded into a sidewall may be a maximum or a permitted range rather than the bike's operating target. Read the complete wording before setting pressure.
Should a heavier rider increase tire pressure?
Possibly, but only within the approved limits and in small steps. More total load increases tire deflection, so the starting specification may need adjustment when the documentation provides a load-based range.
• Count riding gear, tools, and cargo in the load.
• Change one tire at a time in a small increment.
• Do not jump to the sidewall maximum; it is not automatically the correct setting.
Should the rear tire have more PSI than the front?
Not necessarily. Front and rear loads, tire sizes, casings, and rim limits can differ, so use separate specified values rather than forcing both tires to match.
If support supplies different front and rear baselines, record them as a pair. Changing both at once makes it harder to identify which adjustment improved or harmed handling.
Can I lower PSI for rocks, roots, sand, or mud?
Only when the motorcycle and tire documentation allow it. A small reduction may add compliance and footprint, but too little pressure increases rim-strike, pinch-flat, bead, heat, and steering risks.
Pressure cannot compensate for the wrong tire construction or tread. Return to the approved baseline if steering becomes vague, the tire squirms, or the rim contacts obstacles.
Should tire pressure be checked hot or cold?
Set and compare pressure when the tires are cold, before the ride. Riding, sunlight, and ambient temperature change the reading, so a hot reading is not directly comparable with a cold specification.
Record ambient conditions with your baseline. Recheck after a major temperature change, a tire or tube replacement, or added rider load.
Can I use a bicycle tire-pressure calculator for an electric dirt bike?
No, unless the machine actually uses the bicycle tire and rim system covered by that calculator. Electric dirt motorcycles can use different tire construction, rim design, load, and impact requirements.
Use the calculator only as educational context. The exact motorcycle, rim, and tire documentation remains the authority.
Sources
- Motorcycle Safety Foundation, T-CLOCS Pre-Ride Inspection Checklist (MSF, 2018 revision)
- Dunlop Motorcycle Tires, Frequently Asked Questions: Inflation Pressure (2025)
- Dunlop Motorcycle Tires, Care and Maintenance (2025)
- Dunlop Motorcycle Tires, Off-Road Facts: Sizes, Pressure and Tread (2025)
- Michelin, Check Your Motorcycle Tire Pressure (2026)
- National Highway Traffic Safety Administration, TireWise: Tire Safety Ratings and Awareness (2026)
- National Highway Traffic Safety Administration, Tire-Related Factors in the Pre-Crash Phase, DOT HS 811 617 (2012)
- Silca, Rolling Resistance and Impedance (2026)


Looking for something else?
Electric Dirt Bike Replacement Parts Availability: What Buyers Should Verify Before Ordering
LEARN MORE
How to Check an Electric Dirt Bike for Safety Recalls by Model and Serial Number
LEARN MORE
How to Choose an Electric Dirt Bike Repair Shop: Questions to Ask Before Service
LEARN MORE
How to Lift a Fallen Electric Dirt Bike Without Hurting Yourself or the Bike
LEARN MORELooking for something else?
Electric Dirt Bike Fall Riding on Wet Leaves: Grip, Hidden Obstacles and Braking
LEARN MORE
Electric Dirt Bike Trailside Power Loss: Recovery Plan When the Battery Is Dead
LEARN MORE